


Flexible Edits
I learned this week how to do “non-destructive editing” by converting photos into Smart Objects. Slick!
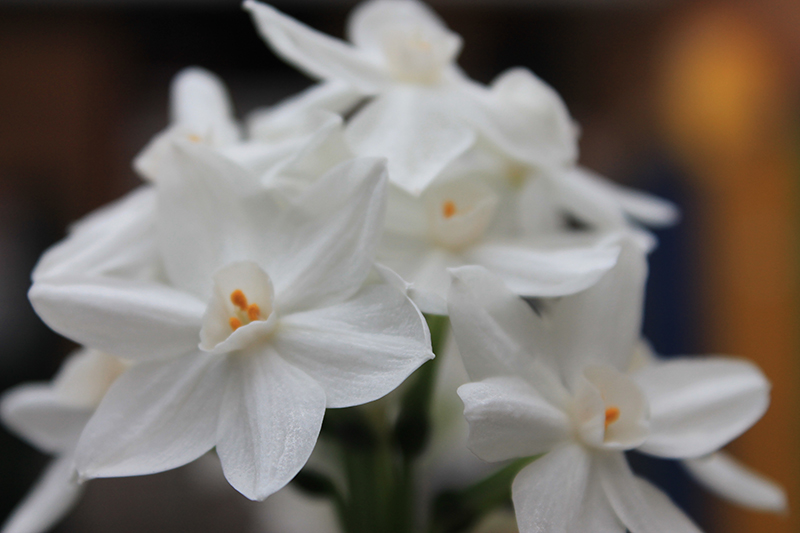
Arrayed in Splendor | Jan. 24, 2013 | 11:39 am | Benson greenhouse, BYU-I Campus; Rexburg, ID | f/6.3 | 1/160 | Canon EOS Rebel T3
I love the dramatic contrast between these delicate white flowers and the mysterious dark background. But I don’t love that the focus is right in the middle! I’ve finally learned how to use spot metering, (thanks Abby!) but that doesn’t help THIS photo…but a smart filter edit will!

That’s better.
I started by converting the photo in Photoshop (Filter > Convert for Smart Filter). Then I added a black mask to the image and chose Filter > Sharpen > Smart Sharpen. I used a combination of the lasso tool and a brush with white paint to reveal the sharpening filter around the cup and petals of the left-most flower to create a solid focal point.
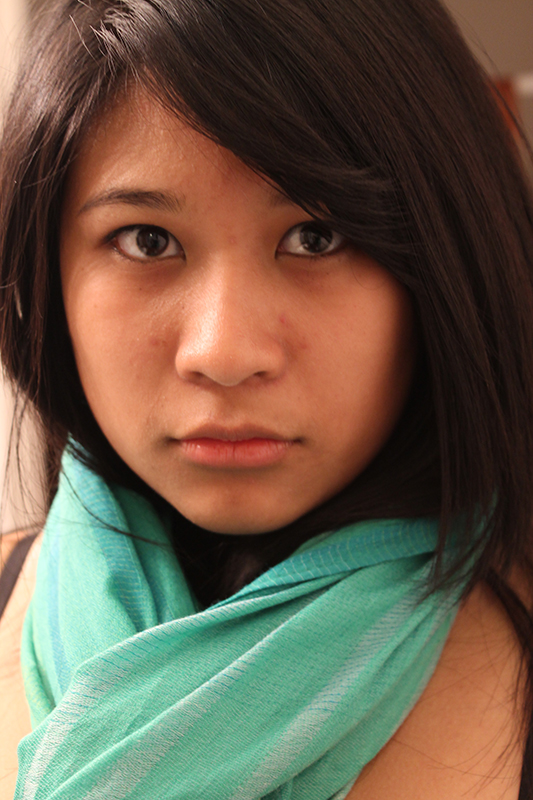
Felicia | Jan. 20, 2013 | 10:33 pm | Rexburg, ID | f/5.0 | 1/25 | Canon EOS Rebel T3
When I took this picture, I didn’t have any idea how to compensate for the over-bright vanity light that washed out the color of Felicia’s scarf. I love the intensity of her gaze, though, so I decided to try and fix the image using adjustment layers.
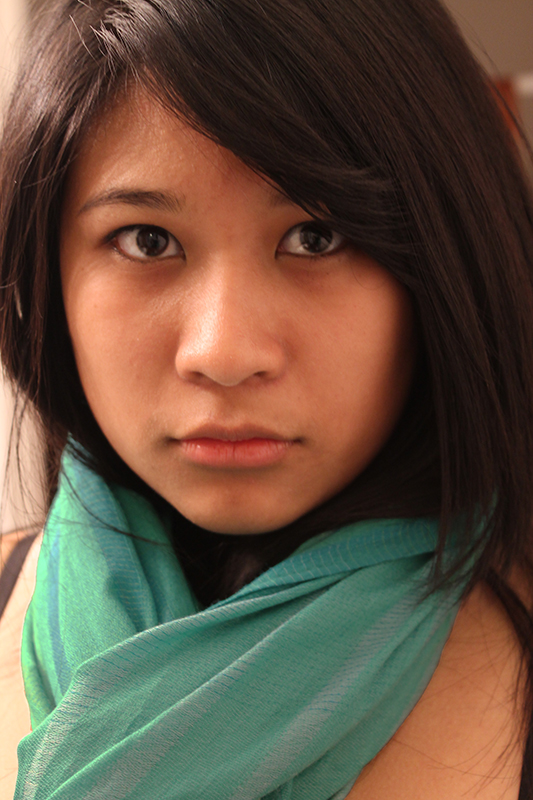
Color-corrected version
I began by using a Brightness/Contrast adjustment layer to bring down the brightness of the whole image. Then I used the lasso tool and the quick selection tool to select her scarf. I inverted the selection and filled the adjustment mask layer with black, so the adjustment would be applied only to the scarf. I used the Content-Aware Move tool to smooth out her complexion a little and then took a hard small brush to the edges of the black on the selection tool to clean it up.
Flora and Fauna

The Color of Passion | Jan. 24, 2013 | 12:04 pm | Benson Greenhouse, BYU-I Campus; Rexburg, Idaho | f/5.6 | 1/50 | Canon EOS Rebel T3
Bromeliads remind me of living in Florida. I found this one growing in the Benson greenhouse. I wanted to really underscore the brilliant red, so I added a soft black shadow around the edges in Photoshop by adding a black layer and then deleting a feathered rectangular selection from the center. Then I turned down the opacity of the shadow layer to blend it more gradually into the image.
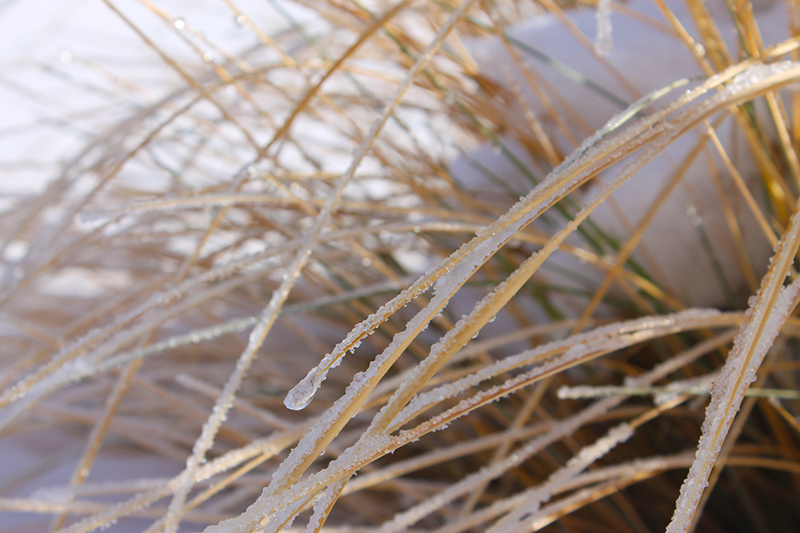
Crystallize | Jan 09. 2012 | 11:28 am | Rexburg, ID | f/9 | 1/250 | Canon EOS Rebel T3
A far cry from the pampered bromeliad above, most of the flora in Rexburg pretty much looks like this: encrusted with ice and half-submerged in snow. Even so, it can be beautiful–I was mesmerized by the crystalline texture on these blades of grass. I had to raise the saturation and vibrancy in Photoshop to bring out the beautiful contrast of the yellow and green grass against the lavender-tinted snow.
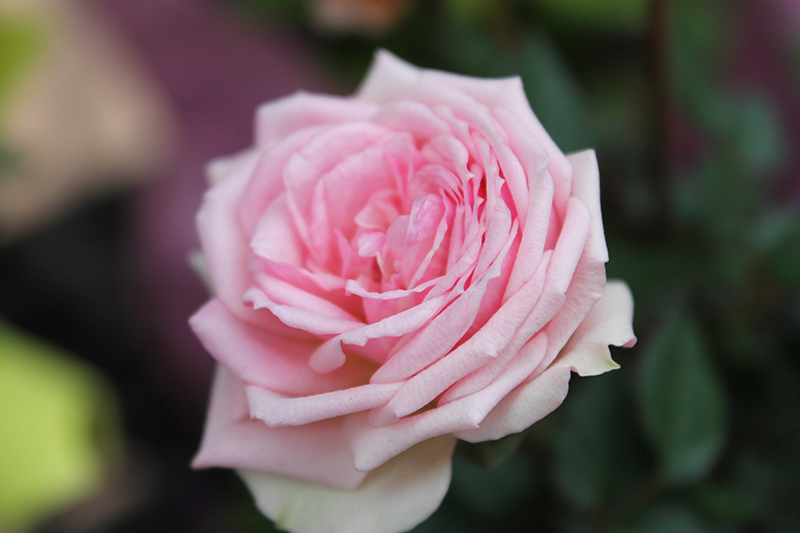
A Light Hits the Gloom on the Gray | Jan. 24, 2013 | 11:40 am | Benson greenhouse, BYU-I Campus; Rexburg, ID | f/5.6 | 1/100 | Canon EOS Rebel T3
This rose looks large, but it’s actually really tiny–about an inch across. I’d like to get a macro lens someday so I can take even closer shots than this, but that will likely have to wait until I’m through school. I didn’t do any edits on this shot.

Simba | Jan. 20, 2013 | 5:09 pm | Blackfoot, ID | f/9 | 1/64 | Canon EOS Rebel T3
This is my cousin’s fat cat, Simba. He’s getting on in years and has all kinds of annoying and endearing idiosyncrasies. I had a hard time getting a good shot of him since he kept moving, and it was too dark to set my shutter speed any higher. I got lucky with this one. I increased the vibrancy significantly and the saturation just a little to capture the last glow of the sunset in his fur and eyes.
Blending Modes and Type Effects

Winter Wonderland | Jan. 17, 2013 | 11:26 am | Rexburg, Idaho | f/4.5 | 1/1600 | Canon EOS Rebel T3
While I don’t think this is a good image technically (it’s too dark and busy…) I like the “feel” of this one. It reminds me of a Christmas card, or even a scene from The Lion, the Witch, and the Wardrobe. I thought I would run with that for my editing assignment and make it look like an old fashioned Hallmark card.
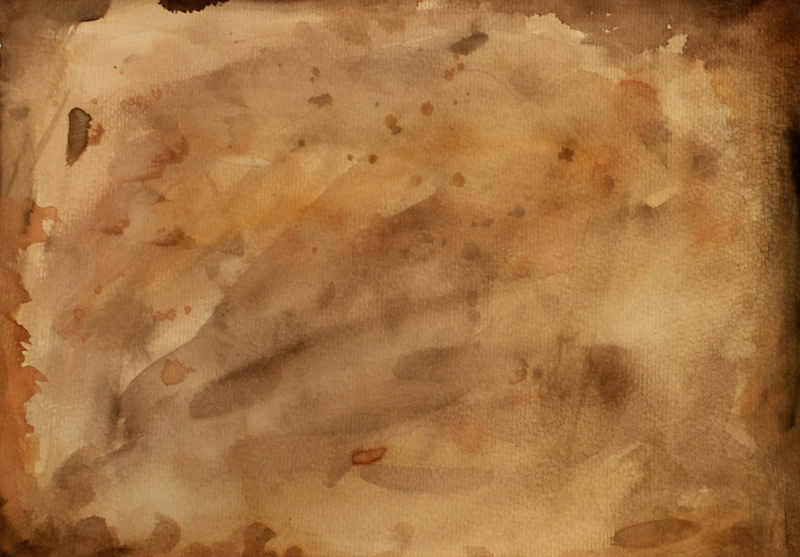
Watercolor Grunge | Jan. 20, 2013 | 8:27 pm | Rexburg, Idaho | f/11 | .6 | Canon EOS Rebel T3
Watercolor and parchment are my go-to when it comes to texture overlays. Instead of finding one online, I made my own. It was nice to work with watercolor again.
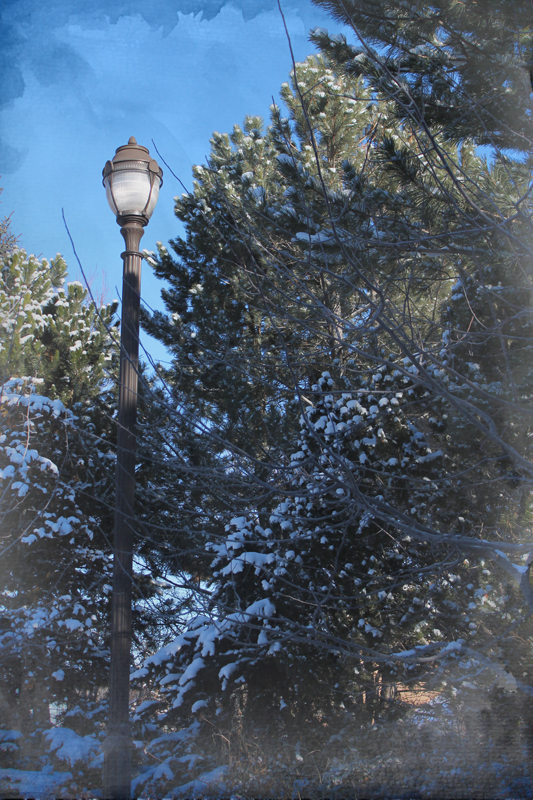
Hallmark
I blended the two together by using the blending mode “linear light” on the parchment layer, and then used a large, soft eraser to reduce the opacity of the texture in spots. I’m pleased with the way it looks like both a painting, and a scene you might see outside of a foggy window.

KayAnne | Jan 19. 2013 | 4:26 pm | Blackfoot, Idaho | f/5.6 | 1/200 | Canon EOS Rebel T3
This is my cousin’s daughter KayAnne! This little girl is so photogenic, my goodness. Every time I aimed the camera at her she’d give me these beautiful, natural looking smiles and wait patiently until she heard the click. I typed out the text (Gill Sans MT) and then changed the blending mode to overlay to get the transparent text effect.
Original:

KayAnne Original
Mint, Forest, Bottle, Jade – a Color Study in Green

Mint Cupcake | Jan. 12, 2013 | 4:08 pm | Rexburg, Idaho | f/5.6 | 1/100 | Canon EOS Rebel T3
I have a soft spot for pretty cupcakes. I love going to Cocoa Bean to look at them as much as I like eating them. This is their “Dirty Turtle” cupcake, and it’s one of my favorites! This image turned out a bit dark, so I enhanced the colors in Photoshop.

Evergreen | Jan. 09, 2013 | 11:27 am | Rexburg, Idaho | f/8.0 | 1/125 | Canon EOS Rebel T3
One of my favorite shots. I didn’t have to do any edits or adjustments.

Light | Jan. 21, 2013 | 8:27 am | Rexburg, Idaho | f/5.6 | 1/320 | Canon EOS Rebel T3
The trees on main street are still strung with lights. I’m beginning to wonder if they ever take them down. I’m not complaining, though; they’re so pretty. I was trying to do a deep focus shot here but I couldn’t figure out how to get both the lights and the Kiwi Loco sign in the background into focus simultaneously. As it happens, I really like the extreme bokeh in this shot.

Jade Pots | Jan. 20, 2013 | 5:15 pm | Blackfoot, Idaho | f/18 | 1/25 | Canon EOS Rebel T3
I’ve gotta say, I’ve only been doing this for less than a month and I’m already tired of taking pictures in the snow. This is another practice with small aperture/deep focus. I enhanced the hues in Photoshop to bring out the warmth of the sunset and sharpened the image.
Priority Modes
This week I’ve been learning more about the camera’s priority modes. I’m stepping up from fully automatic mode!
Shallow Focus – Large Aperture

Winter Berry | Jan. 18, 2013 | 11:17 am | BYU-I campus, Rexburg, Idaho | f/5.6 | 1/1600 | Canon EOS Rebel T3 1100D
I took this shot right outside the BYU-I library. I’m always impressed by the flora that can survive freezing temperatures and still look beautiful. These berries are a little shriveled, but look at that color!
Deep Focus – Small Aperture

The Difference Between Us | Jan 17, 2013 | 11:36 am | BYU-I Campus Gardens; Rexburg, Idaho | f/29 | 1/16 | Canon EOS Rebel T3 1100D
I was so excited to see the sun peeking through my window blinds yesterday, since the sky has been so dreary for the last week. I took my camera along with me to class and as soon as my lunch break rolled around I ran up to the gardens to practice small aperture shots and working with Automatic White Balance. This isn’t my favorite of the shots, but it addresses the assignment the best.
Frozen Action – Fast Shutter Speed

Freeze | Jan. 17, 2013 | 12:53 pm | Rexburg, Idaho | f/5.6 | 1/4000 | Canon EOS Rebel T3 1100D
The temperature warmed up considerably yesterday, so little streams and puddles could be found everywhere from the melting ice. These icicles were melting so fast I thought they would be the perfect subject to test my TV mode with. I had to take about 30 shots to get just a handful that were dynamic and clear enough.
Blurred Motion – Slow Shutter Speed

Astral Scribe | Jan. 18, 2013 | 7:57 am | Apartment living room; Rexburg, Idaho | f/4.5 | 1 sec. | Canon EOS Rebel T3 1100D
This shot was my roommate’s idea! I was wracking my brain trying to think of an interesting photo I could take with a slow shutter speed in a dark place to get the desired blurred effect. Initially Felicia suggested using a sparkler, but we decided that would be a little dangerous to do indoors, so we used a tiny lightsaber. My camera gave me fits taking the image in such a dark apartment, so I had to turn on the self timer to 10 sec, aim the camera at the window, focus, shoot, and then set the camera on the couch pointed at Felicia while she rapidly drew the star shape in the air. I was hoping to get a little bit of Felicia in the background, but it was entirely too dark. In this photo she is sitting cross-legged on the floor; you can see the light reflected on her thigh in the bottom right corner.
Cut Outs

New Life | May 21, 2012 | 8:11 pm | Rexburg, Idaho, BYU-I grounds | f/3.4 | 1/30 | Canon PowerShot SX130 IS
This is one of the earliest photos I have taken for school. I knew nothing then of macro modes, ISO, or, really…anything. I focused on the sprout, then shifted my camera left to get this shot.

New Life – Partial Cut Out
I partially cut out out this image using a combination of Photoshop CS6’s quick selection brush and the lasso tool, then I inverted the selection, deleted the pixels I didn’t want, and refined the edges.

Christmas Orange | Dec. 27, 2012 | 4:58 pm | San Juan, TX | f/4.5 | 1/64 | Canon EOS Rebel T3 | Flash fired
Shot in Automatic mode, no edits.

Christmas Orange – Full Cut Out
I was able to use the polygonal lasso tool due to the box’s clean straight edges, then I cleaned up the selection with Photoshop Elements 7’s selection brush.
Past Photos
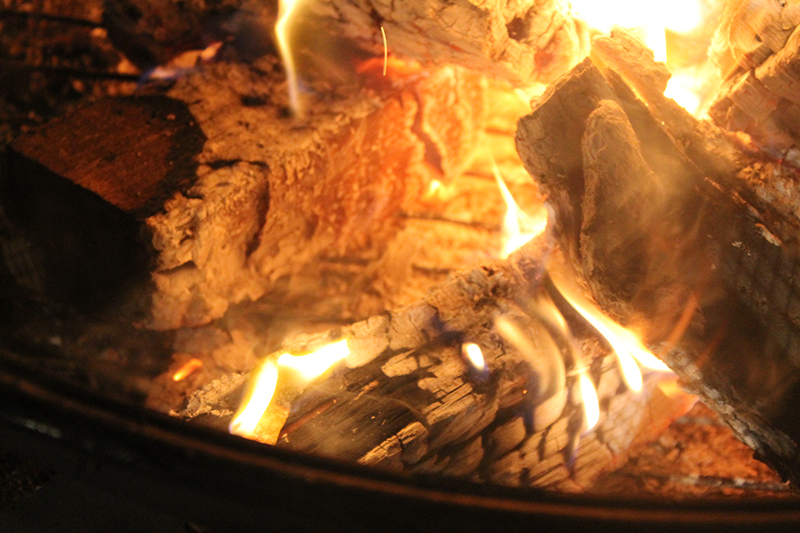
Frito Fire | Jan. 03, 2013 | 7:23 pm | San Juan, TX | f/5.6 | 1/50 | Canon EOS Rebel T3 1100D
Did you know Fritos make excellent kindling? I did! The light from the fire was bright enough that I didn’t have to use the flash. I had to breathe a lot of smoke for this shot, but I think it was worth it.

Marshmallow | Jan. 03, 2013 | 7:16 pm | San Juan, TX | f/5.0 | 1/12 | Canon EOS Rebel T3 1100D
My family and I found the perfect way to roast marshmallows without burning them. You simply heat up the skewer, and then stick it into your marshmallow. Not only does it cook perfectly inside, it doesn’t get sticky on the outside and it releases the neatest plume of smoke. I took a few shots of this, but only this one turned out well.

Blackberry | Dec 29, 2012 | 8:13 pm | San Juan, TX | f/4.0 | 1/40 | Canon EOS Rebel T3 1100D
I shot this in automatic mode, I pointed my camera at mom, told her to smile, and she pulled this weird face and showed of the blackberry she had been about to eat. I like how sharp the focus turned out in this pic, so unfortunately for Mom, her silly face will live forever in infamy on this blog.

Sweet Potato Muffins | Dec. 31, 2012 | 7:18 pm | San Juan, TX | f/4.0 | 1/40 | Canon EOS Rebel T3 1100D
My brother Brandon made these awesome sweet potato buttermilk muffins. Again, this was shot in automatic mode and I can’t take any credit for the quality, because I had no idea what I was doing. I basically just got lucky.

Quintessence and Kitsch | Dec. 27, 2012 | 5:21 pm | San Juan, TX | f/4.5 | 1/60 | Canon EOS Rebel T3 1100D
My Mom keeps a big cabinet in the living room full of all sorts of dolls and figurines. Among them I found this tiny copper nativity. I actually wanted to focus on the Christ child, but the automatic focus grabbed the Mother Mary instead. It ultimately made for a more interesting photo.